If your customers place orders in your webshop, a picklist is generated automatically (if enabled in the settings).

You can see three picklists with the order id, of your webshop.
You as well can generate picklists manually, if you have the permission to manage picklists.
If you click on a picklist, you see the picklist items in the right pane. The cosen picklist is marked with a black border.
Per default the picklists of last 7 days are displayed. You can change this timeframe in the settings. With the calendar widget you can always select an individual timeframe.
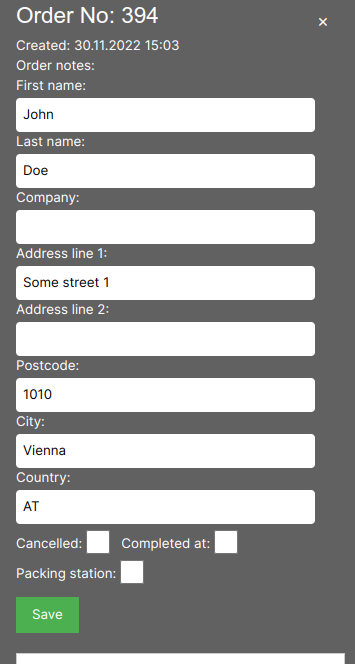
If you click on the pencil in the card, you see details of the picklist (order).

Picklist have different status. Open at the beginning, packing, if all items are picked, but not yet shipped. Completed after shipping or canceled.
For better clariaty picklists are color coded. Open picklists are blue. PIcklists as packing stations are amber, completed picklists are pale green and cancelled picklists are pale red.
Picklists are automatically synced with your webshop. So if you change the status or the products of an order in your webshop, it is updated in your warehouse (if enabled in the settings).
A picklist ist not updated, if it is already completed.
With the scanner app, you can choose a picklist and are the dirrected from one location to the next to pick all products of the picklist.
If all items are picked, the status of the picklist changes to “packing”. You can disable packing in the settings. In this case, the status changes to “completed”.
If you have the persmission to manage picklists, you can change the status of the picklist in the details screen.
If you change the status of a picklist, the status of the order (if it originated from a webshop order) is not changed again. You would have to do so manually in your webshop.
No responses yet